Bathroom Privacy Guide – Windows, Ideas & More in 2025
In home design, bathroom privacy often gets overlooked in favor of more glamorous elements like tile choices or statement tubs.
Retiling your bathroom tiles can help breathe vibrancy and vitality into your old bathroom. Tiles can help create a unique environment and are much more water resistant than traditional bathroom walls. Today, we will walk you through how to retile your bathroom so you can easily undertake this project for yourself. So why would you need to retile your bathroom walls?

Here are 3 common reasons why you would consider this project:
Changing the aesthetics of your bathroom can greatly impact it’s look and feel. Retiling your bathroom wall can add a different material and alter your bathroom’s look to match new fixtures or vanities. It can also be a great opportunity to install a higher quality material to avoid future headaches.
Tiles will eventually crack and degrade over time with use, so it’s important to fix or replace your tiles to prevent damages and other dangers. Similarly, you can also replace the grout or just reseal your bathroom to prevent water damages.
The last reason is just a full remodel of your bathroom. A full remodel allows you to change any aspect of your bathroom and start from scratch. Installing newer, high quality tile can also save you from future headaches as your install is the same and can be quite time consuming.
To begin retiling your bathroom wall, you will need the following items:
Now, with all your equipment gathered, you can begin to remove the tile from your bathroom wall and retile it.

1. Prep the area
The first stage of installing new tile is to prep the area you need to install. This step involves cleaning the area and removing any existing tile or pre-existing wall panels that may exist. To remove your existing tile, you will need to remove the existing grout on your wall. This can be accomplished with either a chisel and hammer or a rotary saw. Ensure that you have proper protection if you decide to use an electrical saw to remove the tile. You will need to remove all existing tile and ensure that your wall surface is smooth and clean to allow for proper adhesion between your new tile.
2. Prep your new tile design
Before you begin laying out your tiles, you need to prep your new design. This requires you to lay out and plan how you want to set up your tile so you can avoid any overlaps and uneven surfaces. Having a proper layout also allows you to avoid narrow rows of cut tiles which is aesthetically much nicer. Using your measuring tape, mark out the designated area of your installation and place appropriate spacers to prep the area you are installing over.
3. Mark and Measure the tile with chalk
Similar to the step previous, you will need to mark and measure your tile with chalk. Be sure to measure your tile exactly to ensure that you have even spacing on your wall. If it does not fit, you will need to cut your tile to an appropriate size to ensure an even distribution. Even tile distribution also ensures that there are no gaps for moisture to get trapped and creates a smooth surface for installation.
4. Make your thinset
After you have planned out your tile layout, it is now time to prepare your thinset. Not to be confused with grout, thinset is required to bond and stick to the backboard of your wall. Composed of an adhesive of cement, fine sand, water and some latex and polymer additives, thinset can support a large range of tile installation. However, before you choose a thinset for your bathroom, you need to determine what kind of material your tile is and what kind of material you are installation over.
If you are unsure of which type of thinset to use, consult a professional to ensure that your thinset has maximum bonding strength to the tile of your choice. Afterwards, you will need to mix your thinset according to manufacturer’s instructions. Be sure to mix your thinset in stages within a large bucket. Never mix a whole bag and keep mixing until you reach the proper consistency.
5. Add your thinset to the wall with your trowel
With your thinset picked out, you can now begin applying your thinset to the wall. Using your trowel, apply a generous amount over the wall surface, making sure to smooth out the thinset as much as possible. Remember never to use more thinset than you can work with as thinset dries very quickly as it’s trowled out. Tile requires a minimum of 80% and 95% coverage in exteriors and wet environments so it is crucial that your tile is properly covered. Start by keying the thinset into the substrate with the flat side of the trowel, then hold the flat side of your trowel at a 45 degree angle to the substrate and pull away from your body, making sure to change direction with each pull. Do your best to comb the mortar in straight lines.
6. Add your first tile to the wall with spacer
Using your spacers, you can place the tile over the thinset that you applied. Place spacers at each corner of the tile which you can then push the tiles together until the next tile hits the spacer. This will ensure that you have an even gap between where all the tiles meet.
7. Measure, space and place your next tiles
After your first tile is installed, you can use your existing spacers to fill in the next tiles. Your spacers will ensure even space between all tiles for later grout additions, so you simply need to measure out the space for your remaining tiles. Simply repeat this process until all your tiles are filled.
8. Add the grout
After your tiles have been placed, you can now add grout. Grout ensures that your wall will have a crisp finished appearance while keeping out dirt and debris that might get in between your tiles. The spacers have created an equal amount of space on the wall, allowing you to easily apply grout in the gaps created. This will also create a more rigid and stronger install for your tiles as they are both bonded to the wall and are adhered to each other as well. Using a trowel and another bucket of water, you will apply grout across all your tile, then use water to gently wipe away grout from the surface of your tile, making sure not to take any of the joint tile grout with it.
9. Set the waterproof tile protecting agent for 24hrs
Lastly, we are applying a waterproof tile agent to the tile. This will come in either a spray or a paste. The type of waterproof agent you will buy will depend on the material of the tile you have chosen. Ensure that you have covered all the primary joints of your tile and allow the agent to set for at least 24 hours.
10. Clean up
With most of your installation complete, you simply need to wait for everything to dry. Ensure that you allow your wall to dry for at least 24-48 hours before using.
Here are some popular tile choices of 2023 to help you get started:
1. Porcelain Hexagon Mosiac-Hexagon and other geometric shapes are quite popular as they can be laid down to create a uniform look or you can mix and match different materials such as porcelain and ceramic to create a unique texture and add more depth to your walls.
2. Ceramic Subway-Subway tile refers to a series of large rectangular tiles usually 3×6 inches that are laid horizontally to each either. They are generally made from ceramic or porcelain and are popular due to their affordability. Although they are typically horizontal but their placement is ultimately up to you, as you can do a herringbone or use a vertical offset. The addition of different colors will also bring vibrancy and character to the wall.
3. Checkered-Alternating checker patterns have always been popular as they allow you to blend different colors into your wall. Consider using a different material for each color change to really compliment the rest of the space with more depth and character. Alternatively, black and white is a classic pairing that works well in both modern and classic spaces.
4. Wood-look Tile-Natural colors will always be a popular part of the bathroom space, and tiles that emulate the look of wood are a popular choice. Normal wood will need to be treated and sealed to survive the humidity of the bathroom, but laminate and synthetic materials can emulate wood without any of these drawbacks.
5. Terrazzo-Terrazo is gaining popularity as it is a stone composite material that contains trace elements of marble, quartz, granite or glass. The result is a material that emulates the look and feel of natural stone but is much more affordable and easier to install, giving your bathroom a luxurious look.
6. Matte Porcelain-Matte porcelain retains all the benefits of porcelain but without the high shine that the material has. It’s matte qualities also makes it easier to pair with other bathroom elements compared to traditional porcelain. Popular color choices include white, greys and deep blues. Matte colors generally are also smoother to the touch when compared to their counterparts.
7. Vinyl Planks-A popular addition to the home as they are inexpensive to install and replace. Vinyl planks can be installed the wall and can be made to emulate any color or material you want, giving you a great deal of flexibility when it comes to design.
8. Matte Ceramic-Matte ceramic tiles generally have a more dull tone than traditional ceramic, making them more ideal for more relaxing spaces. Consider matte colors if you have darker fixtures such as black or grey, to make their features shine.
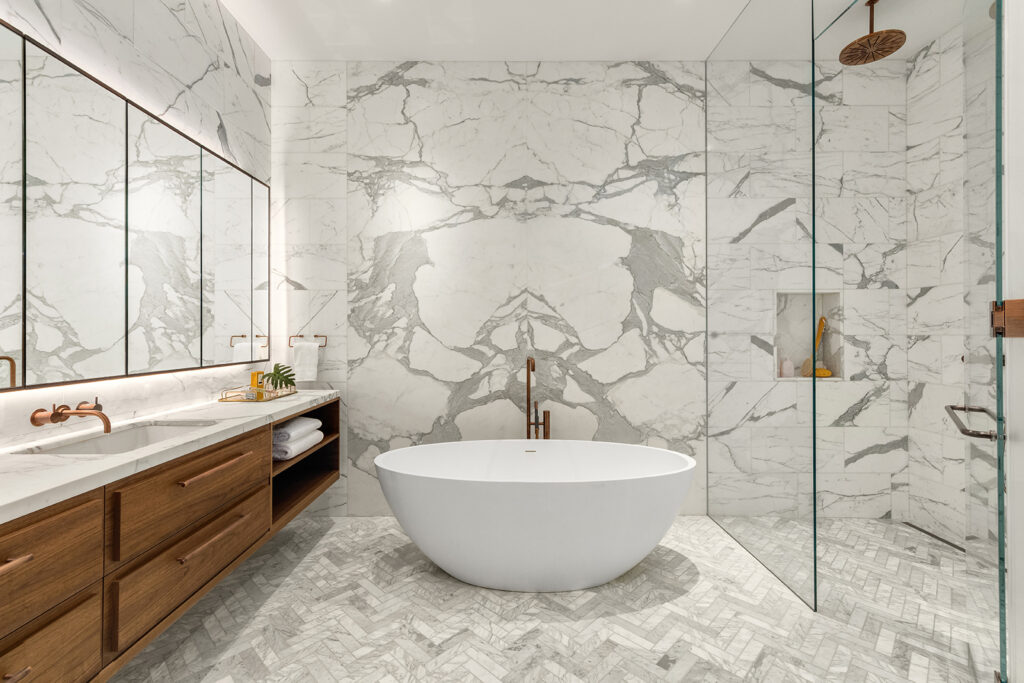
9. Marble Mosiac-A classic style as marble is durable and provides a clean and high-quality aesthetic. A solid color can make your bathroom appear more spacious while alternating colors or patterns can provide your bathroom with more depth.
10. Earth Tone-Earth tone tiles refer to any tile that has a warm color, similar to natural materials, and landscapes. These colors are always popular as they help to transform your bathroom into a more grounded and serene environment. Consider adding metallic elements such as brass or gold accents or even wood to amplify this visual.
A professional can bring a great deal of experience and understanding to any project. They are, however, very expensive and you must conform to their schedule. Also, although retiling your wall is a straightforward project, it is fairly time and labor-intensive. You will need to do your research to ensure that you understand what kind of material you are installing onto what backboard or substrate. In short:
Benefits of DIY
Retiling your bathroom yourself can provide your home with a few benefits, mainly cost.
Pros
Retile at your own pace/no set time table-Doing it yourself means you don’t have to conform to someone else’s schedule and you can finish the project at your own pace.
No install costs-Install costs and hiring a professional can and will get very pricey with material and labor costs. Doing it yourself means you only pay for the material costs and nothing else, which will heavily reduce your project cost.
Room to experiment/make mistakes-With a reduced project cost, you can invest in better materials and experiment with different patterns and designs to see what fits for your space.
Cons
Can be quite labor intensive-Doing it yourself will mean doing all tasks, including lifting and hauling materials from your home which can be quite taxing and exhausting over a long period of time. Although you don’t have to worry about paying someone to install your tile, you will have to replace and install all elements yourself.
Can cause damage-Depending on your experience, you could cause damage to your home if you aren’t careful with installing new materials or removing any existing ones. Refrain from handling any plumbing or electrical elements, please.
Can be dangerous if you are inexperienced-Redocorating and remodeling will require you to handle many elements that can be toxic or dangerous if you have little experience with them. If you are unsure of something, consult a professional.
Quality will vary depending on your experience-Retiling your bathroom will require you to ensure proper adhesion to the wall, otherwise, your tile won’t stick or hold. You must ensure that you properly install your tile the first time, or you will have gaps between your tile which can lead to mold, breaks in your grout, or damage to your home’s structure.
Common Questions associated with retiling
Yes, you can tile your bathroom by yourself. However, it will be incredibly labor and time-intensive. In many ways, hiring a professional for retiling and saving your DIY efforts for other projects is highly recommended.
Depending on the availability of material, you can expect to complete your bathroom walls within 24 hours. If your space is much larger, expect between 4-6 weeks for completion. This number will ultimately depend on the size of your space, the availability of materials, and your design requirements.
Retiling your wall can easily breathe new life into your home. However, remember that it is a fairly labor and time intensive project. So do the proper research and understand the material you want and the material of your home before attempting this for yourself.

Eric is the founder and president of Badeloft USA. He has been the president of Badeloft’s US division for over ten years and oversees all marketing and branding aspects of Badeloftusa.com.
His expertise lies in small business development, sales, and home and bathroom industry trends and information.
Contact us with any business related inquiries.

Free material samples and tub templates

In home design, bathroom privacy often gets overlooked in favor of more glamorous elements like tile choices or statement tubs.

A well-designed bathroom is more than just a functional space—it’s a sanctuary. In today’s fast-paced world, luxury bathroom remodels have

A recent study by Badeloft USA identified the most underrated cities for real estate investments in the US by analyzing safety, affordability,

Toilets may seem like a one-size-fits-all fixture, but they come in various sizes and configurations to suit different spaces and
Fill out the form below to request a free material sample
"*" indicates required fields
"*" indicates required fields
"*" indicates required fields